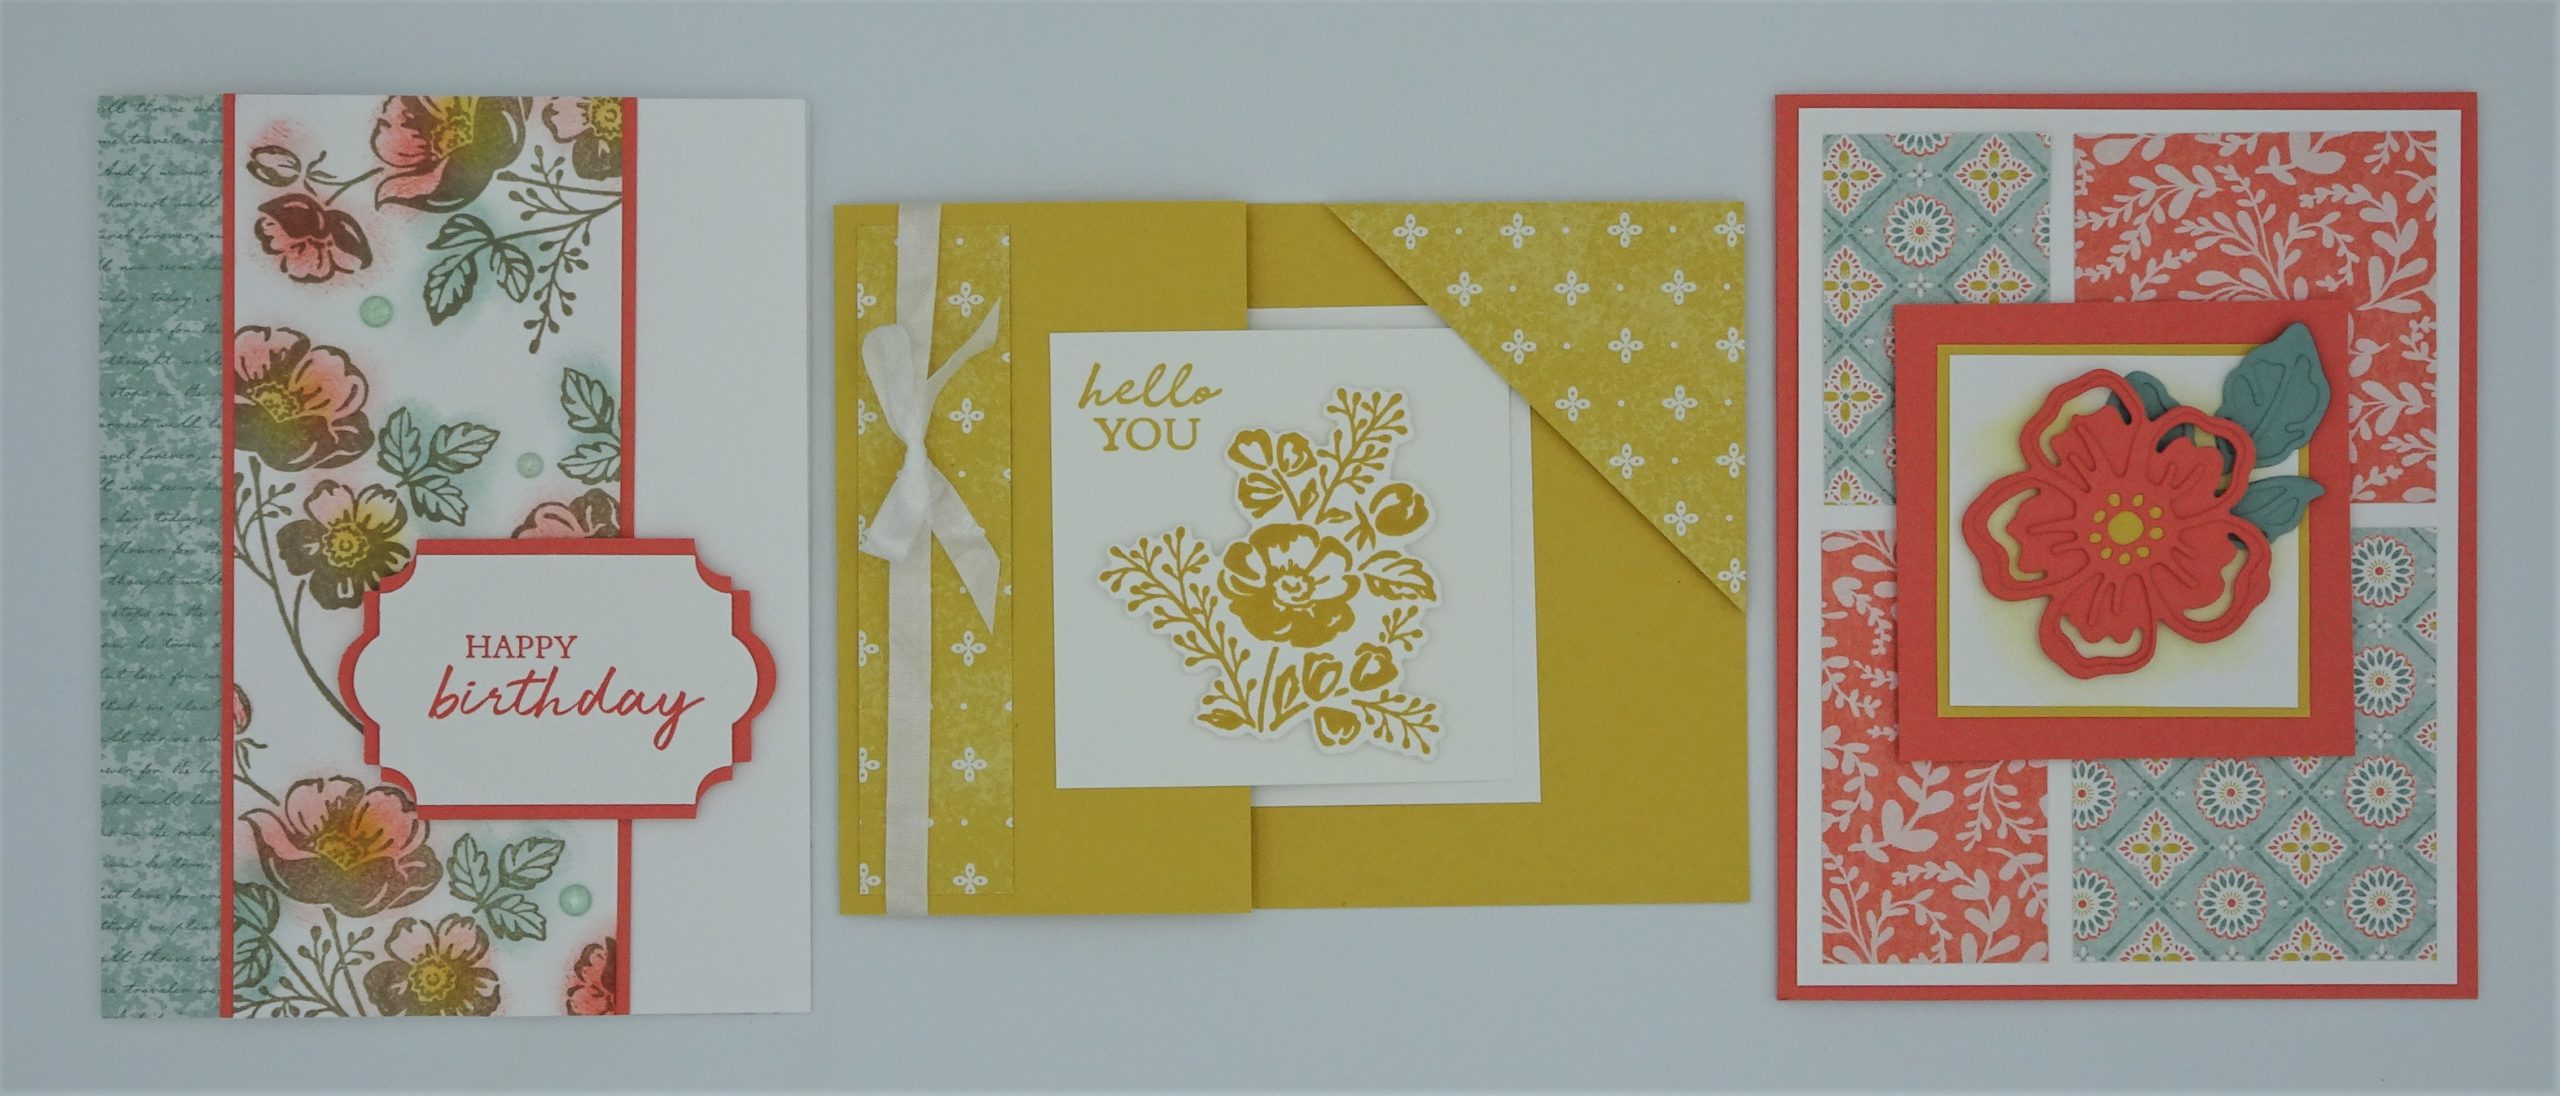
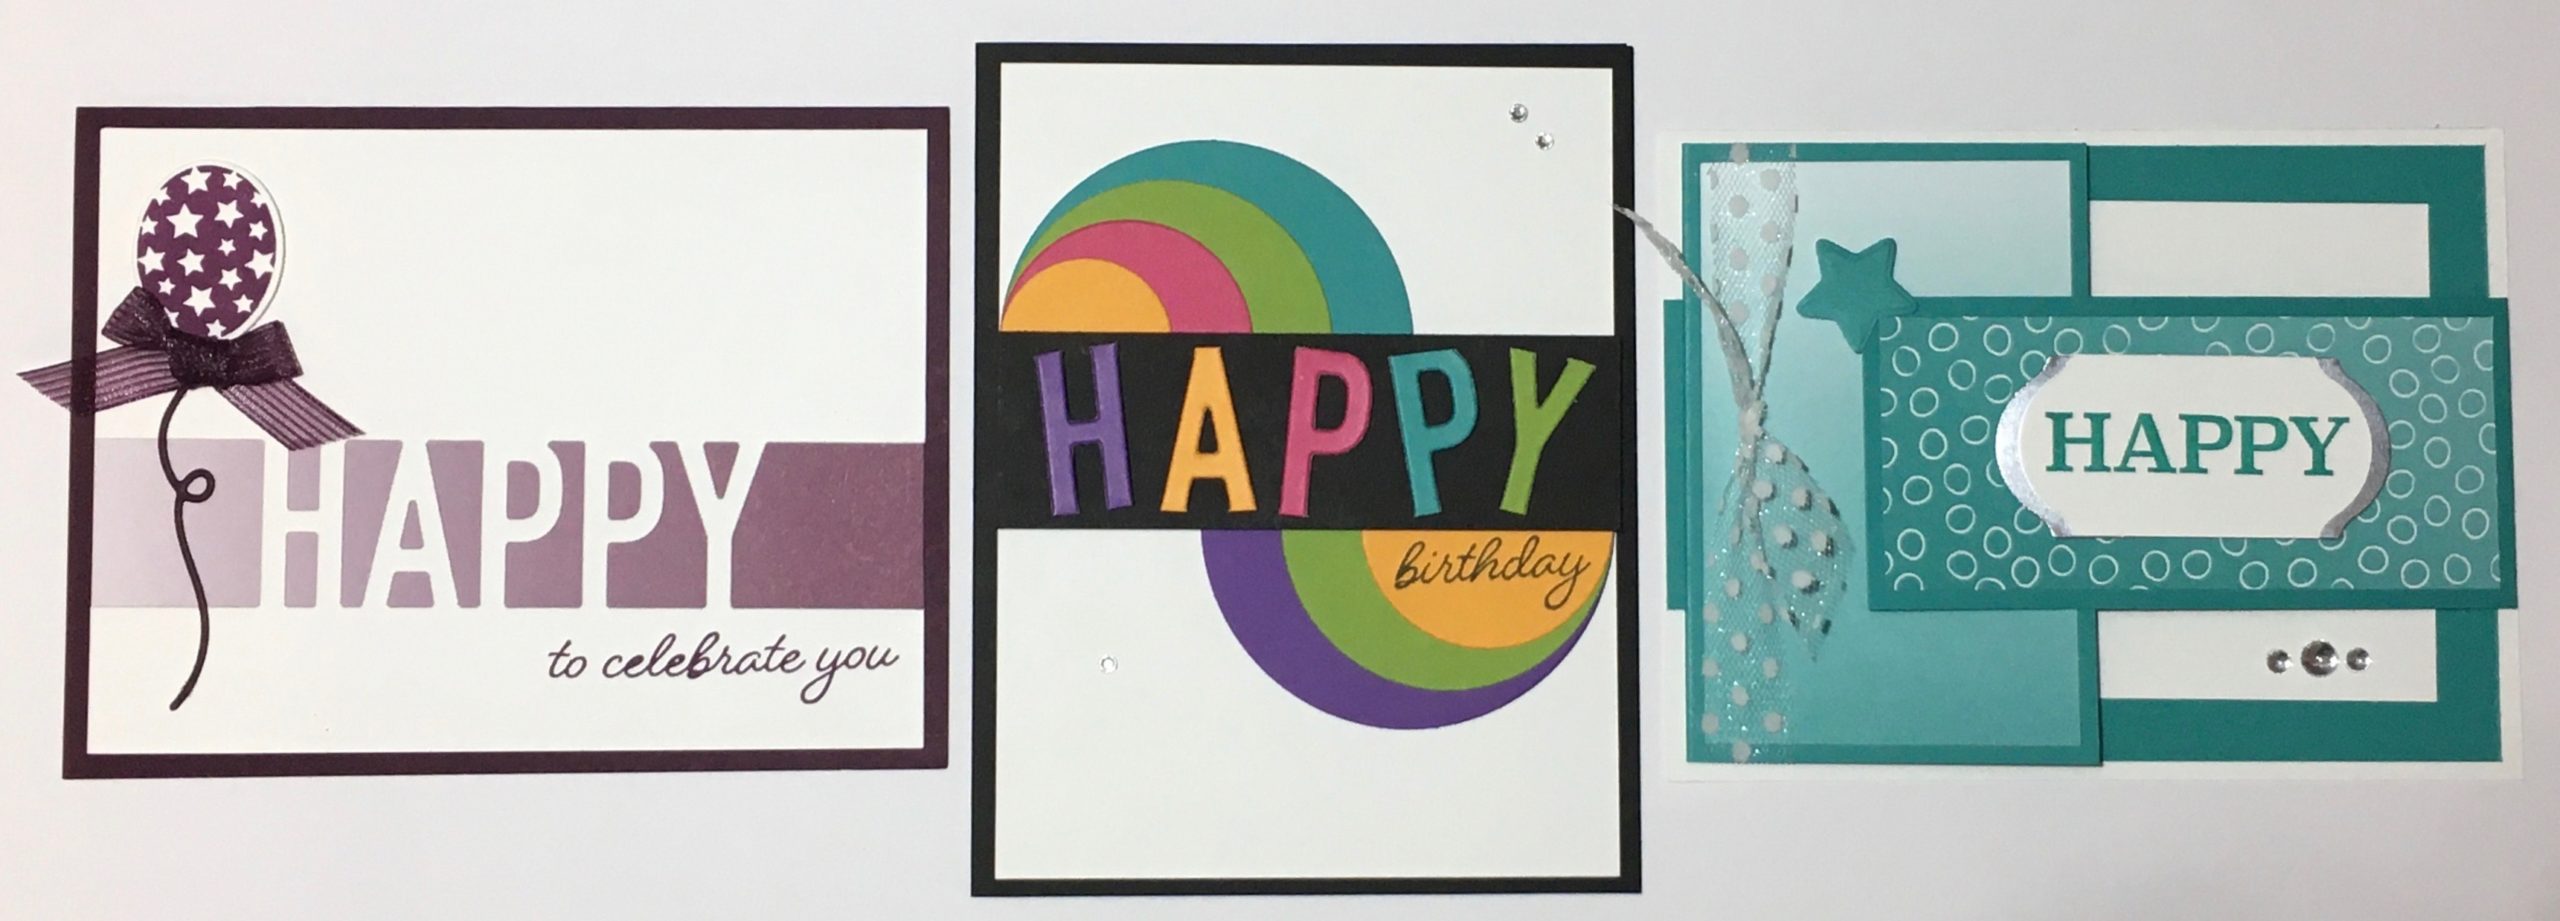
July 2023’s Class by Mail features three card designs (including a fun fold design) using Stampin’ Up!’s Bright & Beautiful suite.
Use the videos below to get all the information you need for making these three card designs. If you’d like exclusive access to a supply list with measurements, sign up for my email list here!
Check out my Pinterest board with lots of fun ideas using the suite.
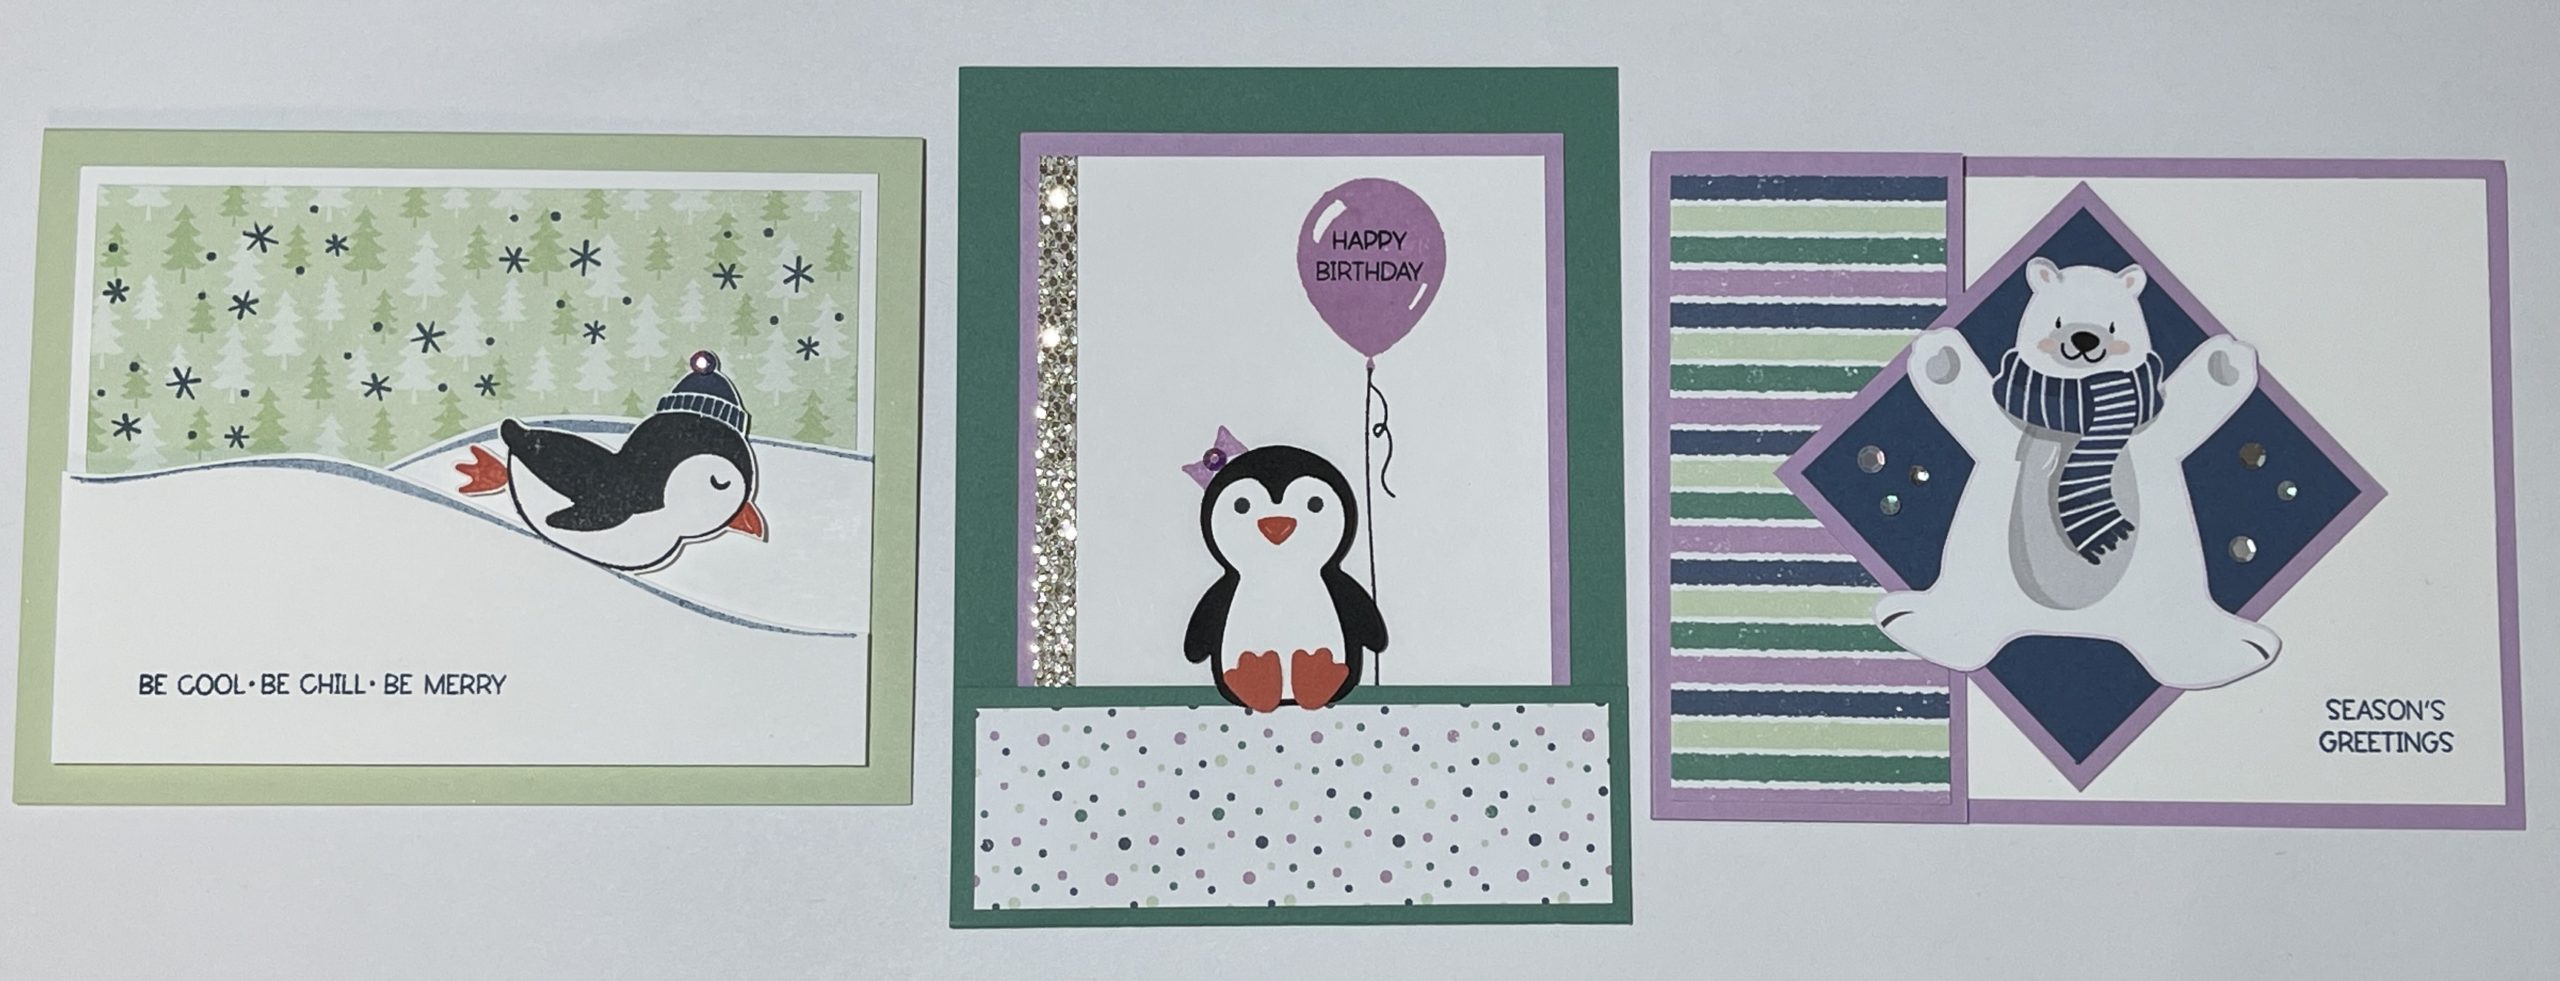
September 2021’s Class by Mail features three card designs (including two fun fold designs) using Stampin’ Up!’s Penguin Place bundle.
Use the video below or the written instructions linked here to get all the information you need (including supply lists with measurements) for making these three card designs.
Also, check out my Pinterest board with lots of fun ideas using the Penguin Place bundle.
August 2021’s Class by Mail features three card designs (including a fun fold design) using Stampin’ Up!’s Shaded Summer stamp set and coordinating Summer Shadows Dies.
Use the video below or the written instructions linked here to get all the information you need (including supply lists with measurements) for making these three card designs.
Also, check out my Pinterest board with lots of fun ideas using the Shaded Summer stamp set and Summer Shadows Dies.
February 2021’s Class by Mail features three card designs (including a fun fold design) using Stampin’ Up!’s Pretty Perennials bundle.
Use the video below or the written instructions linked here to get all the information you need (including supply lists with measurements) for making these three card designs.
Also, check out my Pinterest board with lots of fun ideas using the Pretty Perennials bundle.
January 2021’s Class by Mail features three card designs (including a fun fold design) using Stampin’ Up!’s So Much Happy bundle.
Use the video below or the written instructions linked here to get all the information you need (including supply lists with measurements) for making these three card designs.
Also, check out my Pinterest board with lots of fun ideas using the So Much Happy bundle.
April 2020’s Class by Mail features three card designs (including a buckle fold design) using the Birthday Bonanza suite.
Use the video below or the written instructions linked hereto get all the information you need (including supply lists with measurements) for making these three card designs.
Also, check out my Pinterest board with lots of fun ideas using the Birthday Bonanza suite.
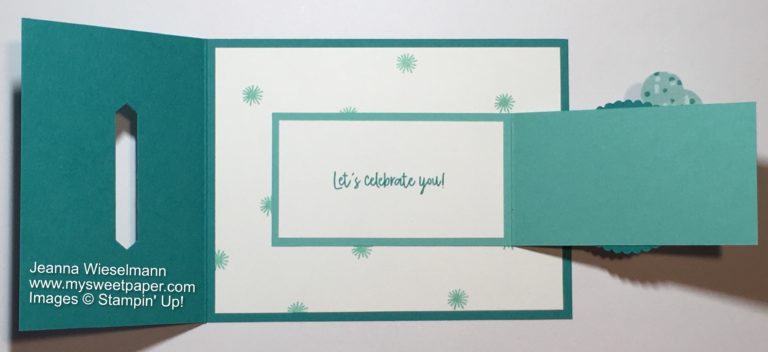
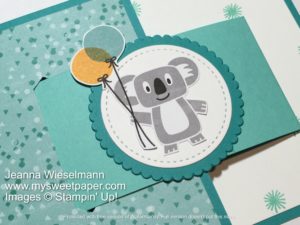
I’ve been spending a lot of time creating with the Birthday Bonanza suite of Stampin’ Up! products. I love the whimsical animals, and especially with the stress and anxiety of coronavirus/COVID-19 right now, I’ll take any excuse for bright colors and cheer! I have three Birthday Bonanza card designs that will be part of the April 2020 class by mail (sign up by April 5, 2020, if you’d like to participate!), and the card I’m featuring in this post was my swap for the month of March.
This card features a fun buckle fold design. I’ll outline the general steps I took to make the card below, but please leave a comment if you have any questions!
Card Tutorial
Stamping
Note: I always like to start with my stamping first. I like to make sure I allow the ink plenty of time to dry, and just in case I mess up, this allows me to flip the cardstock over and get a free second chance!
1. Use Coastal Cabana ink to stamp the pom pom image randomly on a piece of Whisper White cardstock measuring 5 1/4″ x 4″.
2. Use Bermuda Bay ink to stamp “Let’s celebrate you!” on a piece of Whisper White cardstock that measures 3 3/8″ x 1 3/4″.
Die Cutting
3. Die cut a Bermuda Bay scalloped circle (approximately 2 1/4″ in diameter) using the Layering Circles Dies.
4. Die cut a Whisper White stitched circle (approximately 1 7/8″ in diameter) using the Stitched Shapes Dies.
Creating the Buckle Fold
5. Adhere a piece of Birthday Bonanza Designer Series Paper measuring 4″ x 2 3/4″ to a Bermuda Bay card base that measures 8 1/2″ x 4 1/4″, scored at 5 1/2″. The DSP will fit with an equal border on all sides on the smaller side of the scored card base.
6. Slide the card base/DSP layer into the Classic Label Punch. Insert the paper all the way, so the cardstock touches the back of the punch, center on the left and right sides, and punch.
7. Use a Bone Folder to crease the Bermuda Bay card base along the score line.
8. Adhere the Whisper White cardstock stamped with the pom pom to the inside of the card base.
9. Use a bone folder to crease a piece of Coastal Cabana cardstock that measures 7 1/4″ x 2″, scored at 3 5/8″.
10. Apply Snail adhesive to the back of this folded piece of cardstock, making sure it opens the opposite way a card would normally open.
11. With the Bermuda Bay card base closed, slip the top half of the folded Coastal Cabana cardstock in the punched slot. Keeping the edge of the Coastal Cabana cardstock inside the slot, position the bottom half (with adhesive) on the inside of the card base so it is straight and apply pressure to adhere.
12. Adhere the “Let’s celebrate you!” Whisper White cardstock inside the Coastal Cabana folded piece.
Finishing Touches on Card Front
13. Use Snail adhesive to attach the Whisper White stitched circle to the Bermuda Bay scalloped circle. Adhere this assembly to the front of the Coastal Cabana buckle.
14. Fussy-cut a koala image from the Birthday Bonanza DSP and adhere to the Whisper White stitched circle using Snail adhesive.
I hope you enjoyed this card design! You could use many different color combinations and animals from the DSP to switch it up and have more fun designs. I’ve linked all the supplies I used below, and you can order them by clicking the supply images or selecting “Place a Stampin’ Up! Order” along the top of the screen.

")
 Designer Series Paper")
 Specialty Designer Series Paper")
 Specialty Paper")


 Sheer Ribbon Combo Pack")


")
 Designer Series Paper")


 Specialty Paper")


 Designer Series Paper")

 Crinkled Seam Binding Ribbon")


 Designer Series Paper")

 Metallic Ribbon")


")
 Designer Series Paper")

 Polka Dot Tulle Ribbon")